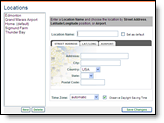
Setting locations for your North American assets allows you to access
weather information for those locations quickly and easily. You are able
to set and maintain up to six locations (unless additional locations have
been purchased). Your created locations are used in the Dashboard, the
Weather Viewer, alerts and the location monitoring features of NWS Bulletins,
PrecipTimer
|
|
One of the North American locations you have created can be set as your default. Your default location will be used as the default for the Dashboard, your daily forecast email and your alert criteria settings. Alert criteria and recipient assignments for individual locations can be edited at any time. If you are under administrator control your Account Administrator will create and/or edit your locations as needed.
|
User Tip: Observed and forecast data will be provided by the surface
observation site closest to your location. However, PrecipTimer
|
Click the Settings Menu tab.

Click the Locations Menu option.
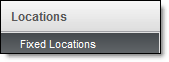
You will be re-directed to the Locations page.
Click the New button to add a location. If you do not
request a new location the currently selected location will be modified.

The interface defaults to the Street Address tab.
Enter a unique name in Location Name. Set as the default
location, if desired.

Enter the street address of your location. Include the
Country (USA or Canada), State or Province, and Postal Code as needed
until the address can be selected from the drop down.

Select Automatic or the time zone of your choice from the Time Zone drop down menu.
Click Save Changes.
Click the Settings Menu tab.
Click the Locations Menu option.
You will be re-directed to the Locations page.
Click the New button to add a location. If you do not
request a new location the currently selected location will be modified.
Enter a unique name in Location Name. Set as the default location, if desired.
Select the Lat/Long tab.
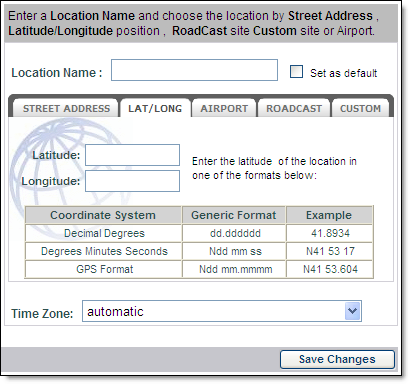
Enter the Latitude and Longitude of your location using one of the three formats displayed.
Select Automatic or the time zone of your choice from the Time Zone drop down menu.
Click Save Changes.
Click the Settings Menu tab.
Click the Locations Menu option.
You will be re-directed to the Locations page.
Click the New button to add a location. If you do not
request a new location the currently selected location will be modified.
Select the Airport tab.
You may enter a unique name in the Location Name field. If no name is entered the airport ID will automatically be used.
Set as your default location, if desired.
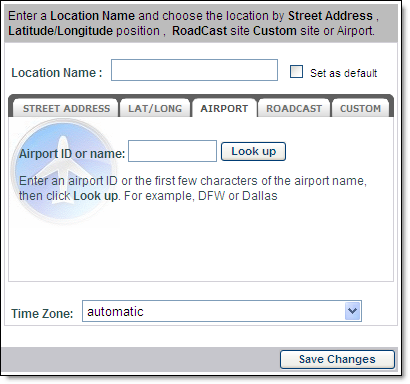
Enter the airport ID or name.
Click the Look up button.
Select Automatic or the time zone of your choice from the Time Zone drop down menu.
Click Save Changes.
Click the Settings Menu tab.
Click the Locations Menu option.
You will be re-directed to the Locations page.
Click the New button.
Select the RoadCast tab.
Highlight the desired site. The site name appears in Location Name where it can be modified or left as is.
Set as the default location, if desired.
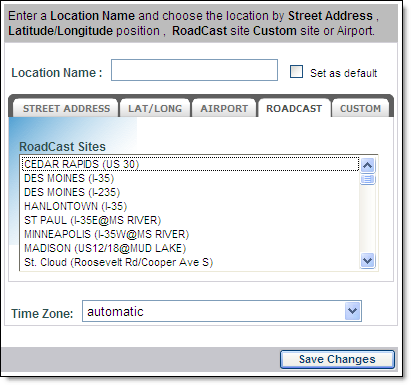
Select Automatic or the time zone of your choice from the Time Zone drop down menu.
Click Save Changes.
Within the Weather Viewer use this method to quickly add a location to your layered map.
From the Locations function menu, select Add Location.
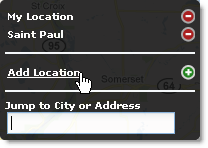
Choose Add a Location. The popup will appear over the
center of your screen.
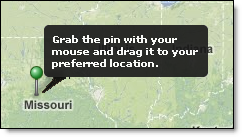
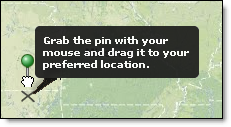
Drag the marker and place the X over your desired location.
Name your location.
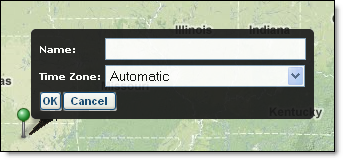
Choose your time zone or select Automatic from the Time Zone drop down menu.
Click OK.
Select the Settings Menu tab.
Click the Locations Menu option.
You will be re-directed to the Locations page.
Highlight the location to be removed.
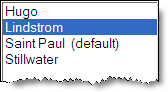
Select Delete.
Hover over the Locations Menu.
Click the location to be deleted.
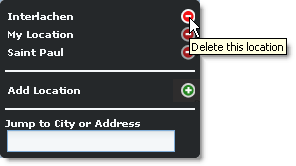
The location is permanently deleted from your location list.
Select the Settings Menu tab.
Click the Locations Menu option.
You will be re-directed to the Locations page.
Highlight the location to be modified.
Update the location information.
Click the Save Changes button.
![]()